
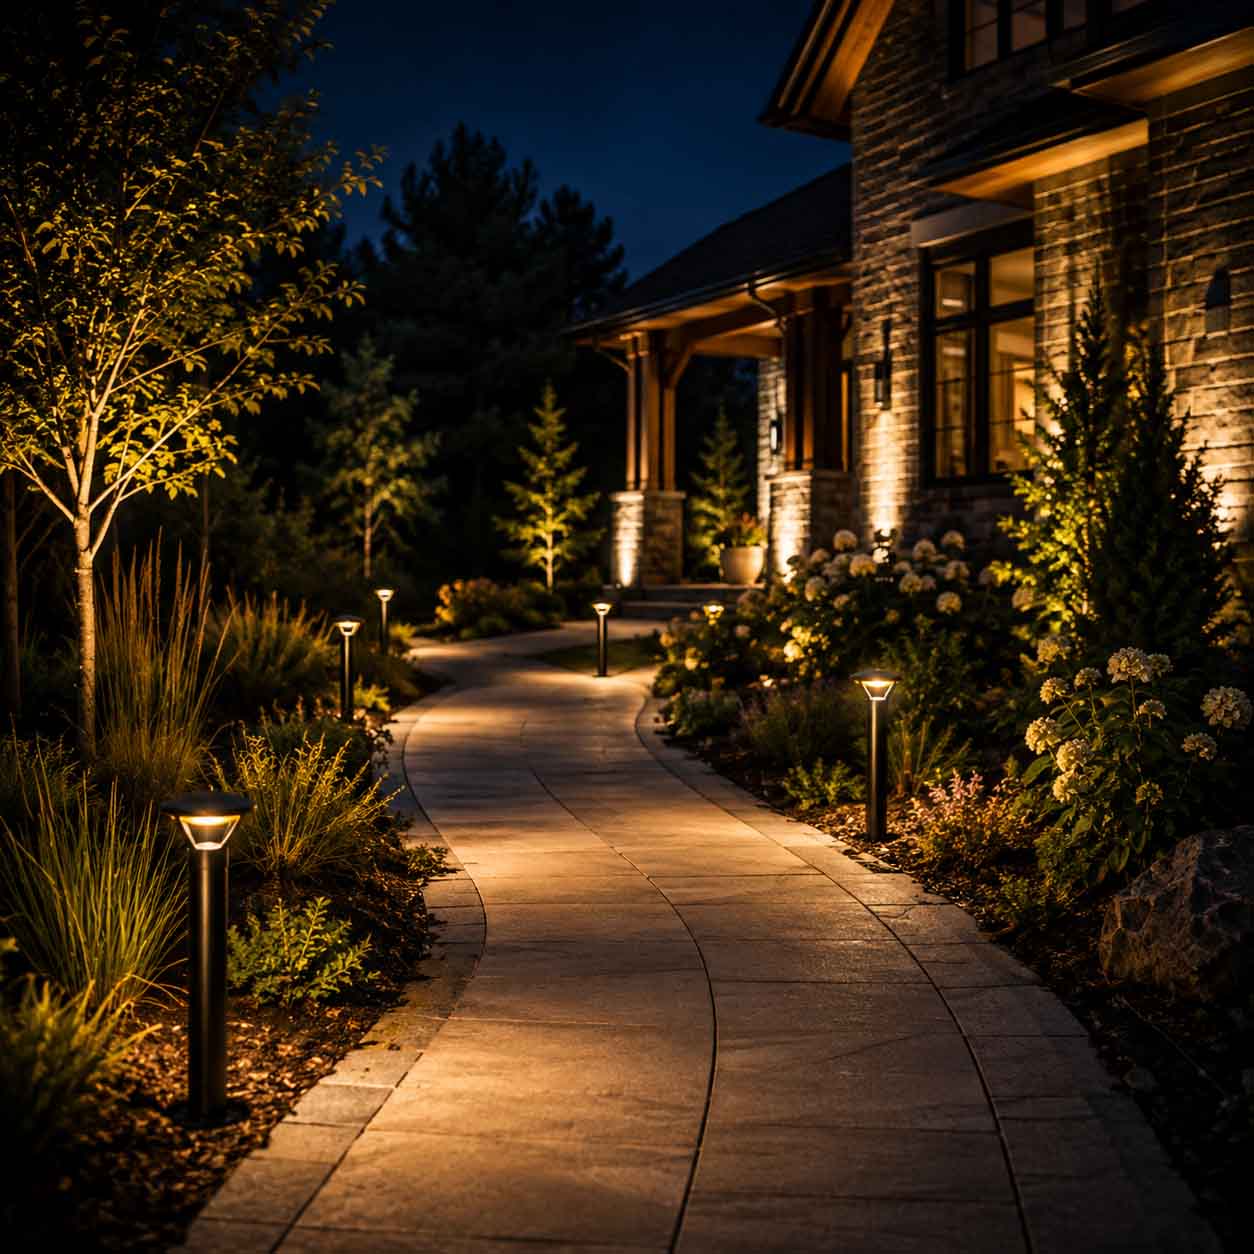
A landscape lighting layout is a plan for where each fixture sits, how far apart fixtures are spaced, and what each is meant to light. Get it right and a modest set of fixtures makes a property feel finished. Get it wrong and you get bright spots, dark gaps, and glare. This guide covers the landscape lighting design process, the fixture types that do the work, and the spacing and install steps that hold up in the field. When you are ready to pick hardware, our outdoor landscape lighting collection carries the path lights, bollards, post tops, and wall fixtures referenced throughout.
Start With a Map, Not a Fixture List
Most homeowners begin by choosing light fixtures. That is backwards. The layout comes first, because it tells you how many fixtures you need and what type each has to be. Good lighting design starts on paper.
Walk the property after dark
Walk the route a guest takes from the curb to the front door. Note where you slow down, where you cannot see the edge of a step, and where trees or a stone wall disappear into the dark. Those are your fixture locations. Sketch the house, driveway, paths, and planting areas, then mark each fixture placement with a symbol for what it does.
Mark the three jobs lighting has to do
Every fixture on a good plan serves one of three jobs. Safety lighting keeps people on the walking surface. Accent lighting highlights trees, a statue, or architectural features. Overall illumination fills outdoor spaces so the yard reads as one composition. Label each mark with its job, and if a fixture does not have one, take it off the plan.

The Fixture Types That Do the Work
Fixture types are easier to choose once the layout is set, because each is built for a specific placement. These carry most residential outdoor lighting plans.
Path lights
Path lights sit low and cast a soft glow onto the walking surface. They are the workhorse of most landscape lighting plans. Our 1.6W 100 lumen single tier path light is typical: low wattage, wide beam, aimed at the ground rather than the eye.
Bollards
Bollards are taller cylinders, two to four feet, lighting a wider circle than a path light. They suit driveways, wide walkways, and commercial entries where fewer fixtures cover more ground, and they hold a line along long paths. Both are LED lights, so energy efficiency is built in. The 4.4W path bollard and the 1.4W bollard path light cover the two common brightness tiers. You can see the full range in our pathway lighting collection.
Post tops
Post tops mount on a column or pole and light a driveway entrance, courtyard, or property line. They carry more visual weight than a path light, so they work best at entries and corners. Our Kensington post top is a standard residential size, and replacement globes are in the lamp post globes and acorns collection.
Wall mounts and step lights
Wall sconces and bulkhead fixtures mount to the house, garage, or a pillar and wash light down a facade. Step lights sit in a riser or deck edge and light the tread without putting a fixture in the walkway. Well lights do the same flush with the ground, which keeps hardscape and paths clear, and they work under trees where a staked fixture would be in the way. The LED deck and step light with saddle handles stairs and deck perimeters, and the wall mount collection covers facades and entries.
Spotlights and floodlights
Spotlights throw focused beams at a single subject. Floodlights throw a wide beam across a broad surface. Use spotlights for trees, statues, and architectural details, and floodlights only where you need coverage, since they are the easiest fixture to overdo. Accent lighting works best when spotlights are few and deliberate. Our 3.6W 400 lumen spot and flood light covers both duties at a residential scale.

Spacing: How Far Apart to Set Fixtures
Spacing is where most layouts fail. Set too far apart, fixtures leave dark spots. Set too close, they create a runway.
Pathways and walkways
A common working range for path lights and bollards is 10 to 20 feet apart, staggered side to side rather than in matched pairs. Staggering lets each fixture fill the gap left by the one before it, giving more even coverage with fewer fixtures. Tighten spacing where the walking surface changes: a turn, a step, or lawn to hardscape.
Driveways
Driveways take wider spacing because fixtures are brighter and the surface is wider. Mark the entrance and any curve first, then fill the straight runs. The goal is enough light to read the edge of the drive.
Steps and deck edges
Steps are the one place to be generous. Light every step, or light the top and bottom of a short flight so the change in ground level is visible from both directions. A missed step in the dark is the safety failure this work exists to prevent.

Lighting Techniques That Create Depth
Lighting techniques separate a plan that looks designed from one that looks merely lit. Most landscape lighting design uses all four of these somewhere.
Uplighting
Place a spotlight at ground level and aim it up into a tree canopy, a column, or a facade. Uplighting creates height and drama, and it is the technique most used on mature trees. Keep the fixture close to the base and angled so the source is not visible from the patio or street.
Silhouetting
Put the light behind the subject, aimed at the wall or fence behind it. The subject reads as a dark shape against a lit surface. Silhouetting suits shrubs and plants with a strong outline.
Moonlighting
Mount a fixture high in a tree and aim it down through the branches. The light casts patterned shadows on the ground, mimicking natural moonlight. Shadows do as much work as light here. It is the technique guests notice least, which is the point.
Wall washing and grazing
Wall washing sets a fixture back from a surface to light it evenly. Grazing sets it close and aims along the surface so brick, stone, or a retaining wall shows its texture in relief. Use grazing where the material has texture worth showing, washing where it does not.
Color Temperature and Brightness
Warm light versus cooler temperatures
Color temperature sets the mood. Warm light in the 2700K to 3000K range gives a welcoming glow and suits residential facades, patios, and gathering spaces. Cooler temperatures around 4000K read as crisp and suit commercial and security settings. Pick one range and stay with it. Mixing warm and cool fixtures in one view is the fastest way to make a good layout look accidental.
Think in lumens, not watts
Wattage tells you what a fixture draws. Lumens tell you how much light it delivers. Because LED lights produce more light per watt than halogen, energy efficiency comes free and you should compare lumens rather than wattage. Our path and bollard fixtures list both, so a 100 lumen path light and a 400 lumen flood light are directly comparable.
Low Voltage and Line Voltage Systems
How a low voltage system works
A low voltage landscape lighting system runs a transformer off a standard outlet, steps 120 volts down to 12 volts, and feeds low voltage lights through buried cable. The low voltage makes it a realistic DIY project, and it is the system behind most residential landscape lighting design.
Voltage drop and cable runs
Voltage drop is the loss of power along a cable run. Fixtures at the far end receive less voltage and look dimmer than those near the transformer. Keep cable runs short, split the layout across several runs rather than one long line, and total your fixture wattage before choosing a transformer so there is headroom for future expansion.
Line voltage fixtures
Line voltage fixtures wire into 120 volt circuits directly. Post tops, wall packs, and dusk to dawn fixtures are commonly line voltage, and that work belongs with a licensed electrician. Many properties use both.
Wiring and Install Steps
Lay out the fixtures before you dig
Before you install anything permanently, set every fixture in its planned placement, connect them temporarily, and run the system after dark. Moving a fixture two feet now costs nothing. Moving it after the cable is buried costs an afternoon.
Bury the main cable
Once positions are confirmed, trench the main cable along the route. Six inches deep is a common working depth, clear of irrigation lines and away from bed edges where a spade is likely to land later.
Connect, test, and adjust angles
Connect each fixture, power the system, and check it after dark again. Adjust angles so no fixture aims into a window, a walkway, or a neighbor's property. This pass is the difference between a system that is installed and one that is finished.
Controls: Timers, Photocells, and Dusk to Dawn
A landscape lighting system still needs to turn itself on. Timers run it on a fixed schedule. Photocells sense ambient light and switch at dusk, which keeps the system aligned with the seasons. Both install in line with the transformer. Dusk to dawn fixtures have the photocell built in. If you are wiring a sensor yourself, our guide to installing an automatic dusk to dawn photocell sensor covers the process step by step.
Avoiding Glare, Light Trespass, and Over Lighting
Shield the source
The U.S. National Park Service describes light pollution as occurring in three ways: glare, bright light shining directly at the observer and interfering with vision; light trespass, the unintended spill of light onto other people's property; and skyglow, the brightening of the night sky by scattered artificial light (National Park Service, Light Pollution). All three are layout problems before they are fixture problems. Aim fixtures down, shield the lamp so it is not directly visible, and use the lowest output that does the job. Over lighting is the most common fault in outdoor lighting.
Wildlife-friendly lighting near the coast
On Florida beaches and other coastal properties, lighting is regulated for wildlife. The Florida Fish and Wildlife Conservation Commission sets three criteria that wildlife lighting must all meet: keep it low, mounting as low as possible at the lowest wattage needed; keep it long, using wavelengths greater than 560 nanometers such as amber, orange, and red LEDs; and keep it shielded, using fixtures that meet or exceed full cutoff (FWC, Wildlife Lighting). If your property falls under a coastal ordinance, plan the layout around those three rules first. Our sea turtle friendly lighting collection and guide to turtle friendly lighting cover what qualifies.
Maintenance That Keeps a System Working
A landscape lighting system sits in a living yard, so the layout shifts. Clean fixtures once or twice a year, since dirt on a lens cuts output. Check that plants and low branches have not grown in front of a fixture, and re-aim anything a mower or storm has moved. LED fixtures last a long time, so most maintenance is keeping the light path clear.
Common Landscape Lighting Layout Mistakes
Four landscape lighting design mistakes account for most disappointing results. Over lighting, where every feature gets a fixture and nothing stands out for lack of contrast. Even spacing along straight paths, which produces the runway effect. Mixed color temperatures in one view. And fixtures aimed at eye level, which turns accent lighting into glare. Each is fixed on paper before it is fixed in the yard.
Where to Start
Sketch the property, mark safety fixtures first, then add accent lighting where trees or a wall earn it. Choose fixture types by placement, stagger spacing at 10 to 20 feet, hold one color temperature, and test above ground before you dig. Those design tips cover most residential outdoor spaces. For standards behind commercial and pedestrian work, see our guide to parking lot and pathway illumination standards. When the plan is drawn and you know what each fixture has to do, browse the landscape lighting collection for the path lights, bollards, post tops, and wall fixtures to fill it.